Drain flies By Wizzie Brown
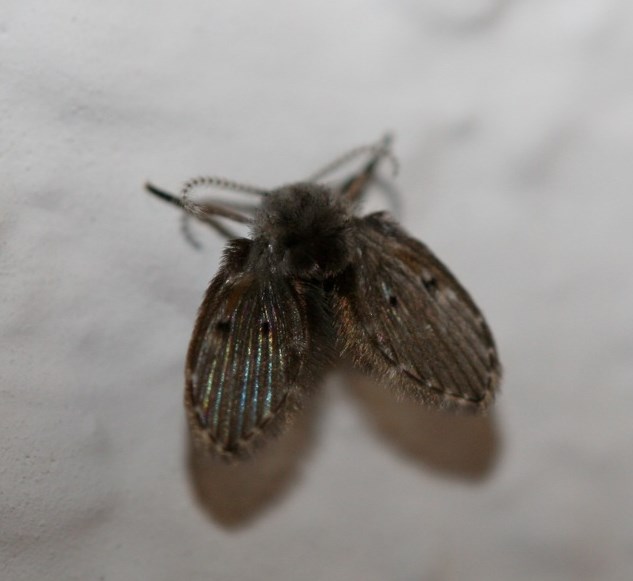
Drain fly by Sam Myers
Drain flies are small, have two wings, and are a brownish or grayish color. Drain flies have a fuzzy appearance and when at rest, the wings are held roof-like over the body making them look like tiny moths, which is why they are also sometimes called moth flies.
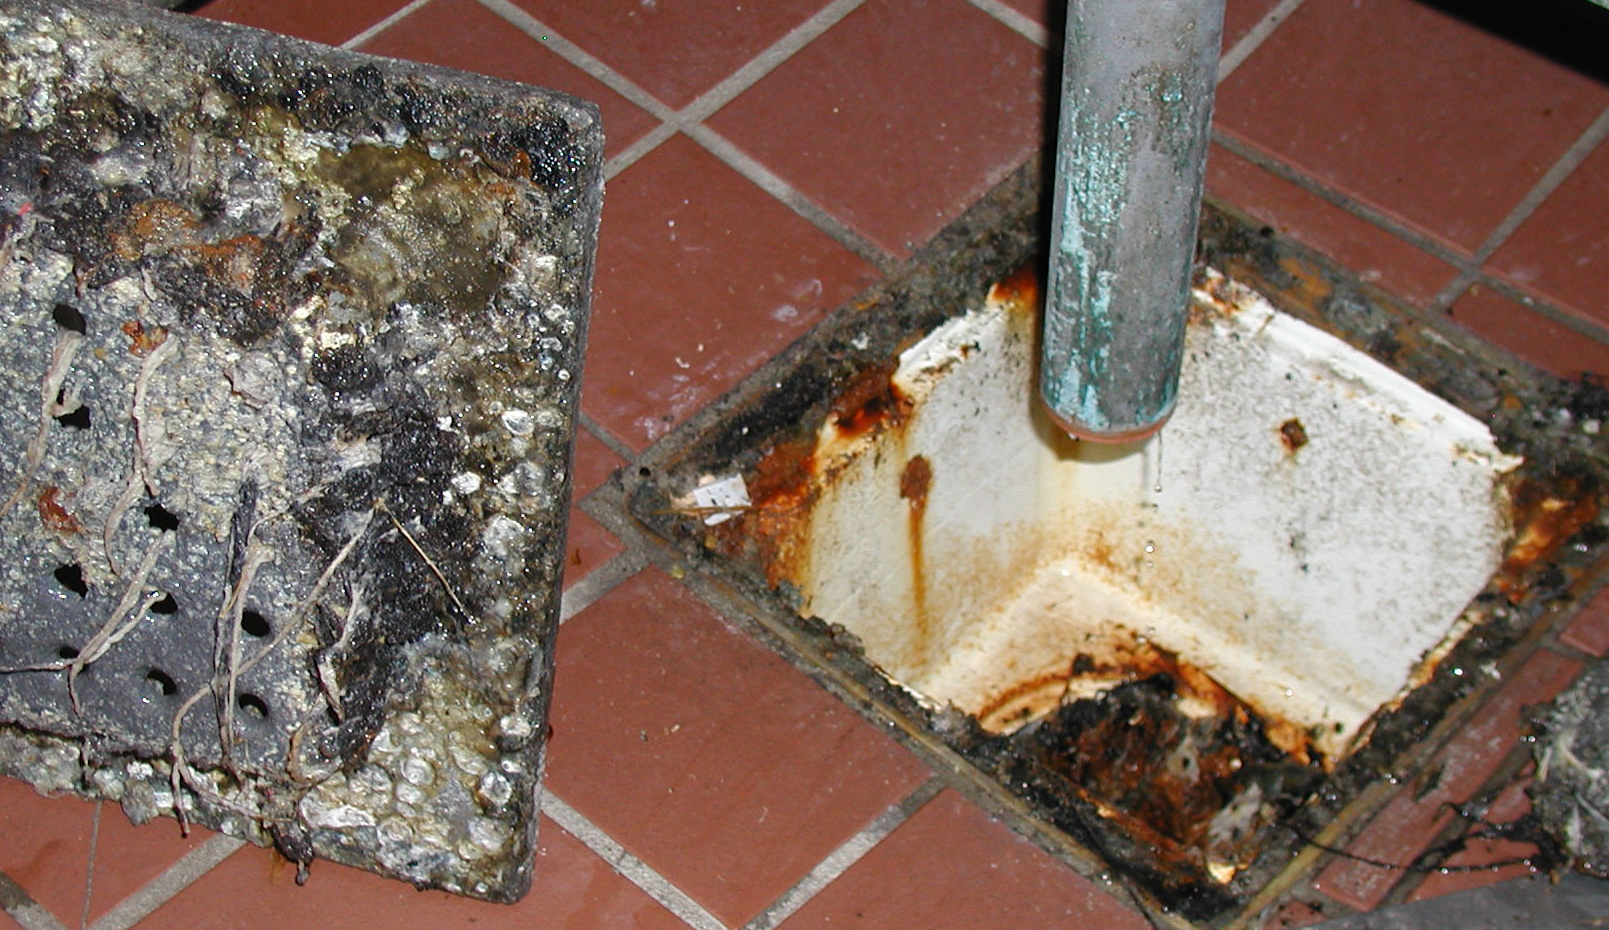
Dirty floor drains can lead to several pest problems including drain flies
source should be treated to reduce the population of developing flies. To track down the source, place tape over one side (do not cover the drain completely) of the drain in sinks and tubs be-fore going to bed. In the morning, check the tape for flies that emerged during the night to find out which drain is infest-ed.
Bat Management – What everyone should know.
Bats, which consume huge quantities of insects, including many that damage crops, are important to our local economies and Texans protect them as valuable allies. However, bats sometimes create a nuisance when they roost in buildings in large numbers. Why do bats roost in buildings anyway? Are they dangerous? Moreover, what is the best way to handle bat nuisance problems?
There are approximately 1,100 bat species in the world. Texas is home to 32 species.
“Texas has one of the most diverse bat populations in the United States,” said Dianne Odegard, Outreach Coordinator at Bat Conservation International.

Mexican Free-tailed bat (Tadarida brasiliensis)
Texas’ most common species is the Mexican Free-tailed bat (Tadarida brasiliensis), probably followed by the Cave myotis (Myotis velifer), both of which often occupy buildings, Odegard explains. Texas bats occupy a variety of habitats including caves, trees, bridges and, increasingly, buildings. They prefer to roost close to an abundant food source, but Mexican Free-tailed bats have been known to travel many miles in a night to feed on their favorite foods. Texas bats consume some mosquitoes, but their diets consist primarily of moths, including corn earworm and armyworm moths, and beetles. This diet plays a large role in controlling pests for the agricultural community.
Most of us become concerned about bats when they come in close contact with humans. Bats are creatures of habit and will frequently return to the same roosting area year after year. Some bats move into buildings because they have lost their natural habitats in caves and trees. They usually cause no problems, but when large colonies roost in buildings, they can become an annoyance because of noise, odor, or piles of droppings. Like other wild mammals, some bats contract rabies. Although only very small percentage is infected, a bat that is found on the ground is more likely than other bats to be sick or injured. Therefore, the first thing to remember is that neither adults nor children should handle bats, or for that matter, any other wild animal they can approach. If there is any possibility that a child or other individual may have been bitten or had direct contact with a bat, the animal should be captured and submitted to the local health department for rabies testing.

Entry point where bats were entering this school campus.
Most bats that end up in living quarters get there by accident, and then cannot find their way out. These bats can be safely captured by simply waiting until the bat lands on a wall or ceiling, then carefully placing a box or coffee can over it. Slide a piece of cardboard between the box (or can) and the wall (or ceiling) so the bat is scooted inside. See www.batcon.org for a short video, which can be accessed on the home page, on safely capturing a bat. If it is determined that the bat should be tested for rabies, call animal control or your local law enforcement agency to have it picked up. If no one has had direct contact with the bat, it can be turned over to a wildlife-rescue organization in your area or simply released outside away from people and pets, preferably after sundown
State law requires that a school district take specific actions after bats are found in a school facility: The bat and colony (if present) must be excluded; repairs must be made so that any future bats are excluded; and the areas where bats roosted must be disinfected.
If a bat is found in a room with an unattended child, a sleeping person, an intoxicated or mentally impaired person, or if there is a reasonable possibility that a person has had direct contact with a bat, the bat must be captured (if possible) and submitted to the laboratory designated by the Texas Department of State Health Services that is closest to your community.
Bats in buildings occupied by people can be legally removed or evicted, and a person may transport a bat to have it tested by a laboratory if rabies is suspected.
Bat colonies may roost in attics, under eaves, under shingles or siding or in the wall spaces of buildings. These bats can be safely evicted. First, identify areas in and around buildings where bats can enter. This step is vital for effective placement of bat-eviction tubes and nets.
To witness bats entering or exiting the building, monitor it during early evening (dusk) and just before dawn. Note all locations where bats leave and enter the building. During cooler months, you may need to inspect several nights in a row to establish exit/entry points, because bats may not leave the roost on nights that are cooler than 50 degrees F.
When inspecting the exterior of the building, look along rooflines and behind gutter placement for rub marks, which are stains left by the oils and dirt rubbing off the bats’ hair. Like rodents, bats will leave some evidence of staining; however, bat stains are harder to see. In addition, look at ground level for guano—in most cases, the bat-entry points will have some guano buildup if the colony is large enough.
Inside, identify all parts of the building where they may have established roosts. These areas can include chimneys, attic spaces, wall spaces, ceiling spaces, expansion joints, and roof overhangs. Bats also roost behind gutters, in sports stadiums, and beneath or behind signs and fixtures.
Without disturbing active access areas, seal all potential but inactive entry points using caulk, weather-stripping, flashing, or hardware cloth (heavy-duty, 1/6-inch polyethylene mesh). This is called “bat exclusion.” Bats fly out on their own and are unable to reenter. It is the only safe and effective method for permanently evicting bats from buildings. It is not legal to use pesticides against bats, which often results in sick bats, which then end up on the ground or inside buildings where they are more likely to be found by children or pets. Bat traps are also inappropriate, since they usually result in exits blocked by trapped bats, again causing bats to find their way into places where they could have contact with people.
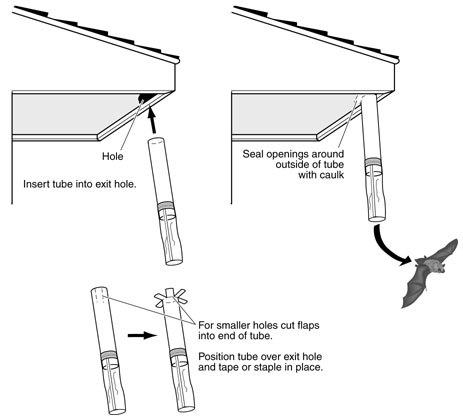
Sample of a bat eviction tube that can be made from clean caulk tubes
Only proper bat exclusion techniques help to ensure the health and safety of people, while ridding buildings of nuisance bat colonies. Help protect both human and environmental health and use proper bat exclusion methods.
1. Install bat eviction devices.
- Buy one-way chutes or make them from 2-inch-diameter PVC pipe, clear sheets of plastic, and empty, clean caulking tubes with the ends cut off. Netting also may be used, as long as it is smaller than 1/6” mesh and is made of flexible plastic. Specific directions on how to make or where to buy bat eviction devices are posted at Bat Conservation International
- If using tubes, place the tubes over the holes in the roof or soffit used by the bats. These tubes will allow them to leave but not reenter the building. If bats are roosting in a long horizontal crevice, place a tube roughly every 4 to 6 feet along the entire distance to make sure all the bats can get out (Fig. 11). Be sure the tubes are angled down at a steep angle to insure that bats cannot climb back inside.
- If using netting, tack down the top and sides, leaving an opening on the bottom for bats to escape. Be sure the netting is secure, or bats can get stuck or reenter the building because of faulty design.
- To ensure that all the bats exit the building, leave these one-way devices in place for at least 1 week during warm weather and 2 weeks in cool weather (less than 50 degrees F).
2. Remove the one-way devices and permanently seal the entry points.
Make sure that there are no new signs of bats leaving the building. If you remove the one-way devices too early, you could permanently seal bats inside, killing them and causing odor and sanitation problems for the school.
3. Clean up.
Once the bats have left the building, begin remediation procedures. Remove the guano from interior structures to avoid attracting other pests such as cockroaches or flies.
Guano can pose two risks: excessive weight on structures, and disease transmission from contaminated materials. A naturally occurring soil fungus, Histoplasma capsulatum, is sometimes found in bird and bat droppings. A person inhaling the fungal spores can develop histoplasmosis, a flulike respiratory disease http://www.cdc.gov/niosh/docs/97-146/
To prevent illness, employees should take precautions when cleaning up guano in a confined area:
- Wear personal protective equipment, including leather gloves, long-sleeved shirt, long pants, approved eye protection, and a respirator that can filter particles smaller than 2 microns in diameter.
- Before removing the guano, lightly dampen it with a disinfectant to minimize the amount of dust and spores dispersing into the air. The Centers for Disease Control (CDC) and the National Institute for Occupational Safety and Health recommend using a 10 percent bleach solution (1 part water to 9 parts of bleach) as a wetting agent.
- If the guano buildup is more than 2 inches deep, follow CDC procedures http://www.cdc.gov/niosh/docs/2005-109/ to remove it from the building.
- Bag the affected material or use a professional vacuum (high-efficiency particulate absorbing, or HEPA) that exhausts to the outside.
- Check with the local landfill or the Texas Commission on Environmental Quality for the appropriate place to send this material, and send it there.
Like other mammals, bats can attract pests such as mites, ticks and fleas. Depending on the roosting location, you may need to apply a desiccant or insecticide dust after eviction to kill any ectoparasites that may have entered the structure.
For more information on a bat management plan for your school visit our website at http://agrilife.org/batsinschools/ or http://www.extension.org/pages/62813/school-ipm-action-plan-for-bats#.Uw4CluNdWIh
Regional Support Models for Sustaining School Gardens – March 4, 2014, 3:00PM CT
Across the nation, foundations, non-profits, school districts, states, and university programs are working to institutionalize school gardens. These “Regional Support Models” work to provide funding, empower garden champions, build partnerships, and lay the foundation for long-term sustainability of school garden programs. In this webinar, various ways that organizations across the nation have created a “culture” of school gardening in their region will be shared. From small district garden programs with four schools to larger organizations that network with over 100 schools, this presentation will share examples of how support organizations can sustain school gardens. Register at http://www.instantpresenter.com/AccountManager/RegEv.aspx?PIID=EC55DD818546.
The National Farm to School Network Releases Training Materials
The National Farm to School Network has recently released a set of new farm to school and farm to preschool training materials developed by and for key stakeholder groups including farmers, child nutrition directors, educators and early care providers. Each training template consists of a customizable slide deck, speaker notes, handouts and an evaluation form. Anyone can use these tools to conduct effective trainings and share the value of farm to school in communities across the country. To access the training materials, go to http://www.farmtoschool.org/trainingtemplates.php.
CDC Releases Healthy Community Design Toolkit
This free online toolkit provides a variety of resources that are easy to read, understand, and use. They include:
- A checklist of questions for individuals, to help them consider and understand healthy community design elements.
- A customizable PowerPoint presentation on healthy community design that explains to individuals how the physical makeup of their neighborhood affects their health.
- A guide to CDC’s Environmental Public Health Tracking Network and other online resources to find health data on a community.
- A resource guide listing other audit tools, websites, checklists and pamphlets that can help residents, planners, public health and local officials create vibrant healthy neighborhoods.
Access the toolkit at www.cdc.gov/healthyplaces/toolkit.

 .
.